Showing posts with label craft room. Show all posts

Tuesday, November 19, 2013

Craft Room Update!!

Hello my Lovelies!

Life has been more than crazy! More on that in a later post...

But for now...
Remember this "unique" find from a few months ago?
I actually finished it a few months ago with DIY white chalk paint and a few coats of matte polycrylic. I finally found time to put finishing touches on the craft room so that it is now presentable as an extra guest room!

Yes, she is indeed a lovely little lady now! 
Take note that the ugly green sofa parts are gone, gone, GONE!!!
In its place, the futon that has gone through college with both sons, once black, now sprayed white. Now, with a sturdy new mattress, so hopefully guests will sleep comfortably and hubby can sit comfortably to watch tv when I am working in here. 

I made curtains to cover up my messes in the closets :)  
The one on the left was a unique challenge...
The one the right was a bit more inspired...


Are you ready for Thanksgiving???


Blessings, 

Ronda

Sunday, June 30, 2013

Tricycle Red Chair

Another chair has been completed for my dining room set!  This was another that originally had wood seat and the rest was white.  After my experience with the last one, I thought I would try a different route so that I wouldn't have the white showing through when I distressed.

So I spray painted the white parts with brown primer.  Primer, thinking that it would hold up better to a little sanding.  Then, once again (since I am a lazy painter) spray painting the whole thing black, followed by a bit of sanding.  

Hmmm....

The overall look, not bad.
BUT...
upon closer inspection...
 Not only did I do a poor job of spraying...

Yep, the white still showed through!  ARGH!
I even tried a little stain on the white spots, but the white paint didn't want to take the stain.  
So, spray it again, or do something a little different?

How about a little red milk paint?

 These were taken after one + a bit more coats of milk paint.  

And then another coat, some sanding, some more messing with paint after the white showed through again.  Still not thrilled...

So, a little dark wax...(and yes, I realize that I am using a lot of dot, dot, dot)

And...
I am actually quite happy with the finished result!


Sorry I didn't get more up close shots.  I tried, but they didn't turn out so great.  You'll just have to come by the house and see it in person!  

So now, I have 6 black chairs and one red!  One more to go to have a complete 8! 

Blessings,

Ronda
Furniture Feature Fridays
Three Mango Seeds

Thursday, June 6, 2013

Craft Room Update Again...


I realized I haven't given you an update since hubby finished the closet reno. The closets in this room have never been terribly convenient.  They are shorter than normal and all the shelving in them was next to impossible to get to.  So I had him cut out the wall and put shelves all the way across so that I would have a place to store all of my paint supplies.  Since taking out the wall left an ugly spot on the floor, he decided to rip out the carpeting in the closet and put in flooring left over from my daughter's bedroom.  This is a temp fix until we save up the money to replace the carpeting in the entire room.  I'm kind of liking the way this flooring looks, though :)

I would like to figure out a way to hide the mess, but the shape of the closet kind of prohibits that.  I would welcome ideas...

Hadn't shown you any pics since I got all of my craft "stuff" put in this room, either.  My daughter thinks it may be tough to get to the thread that I want! Ah, well...it's cute, right?

Some things I found in my grandma's sewing box...

Which is actually the box down there on the bottom shelf.  I still have a small collection of paper patterns that I can't bring myself to get rid of, even though I doubt I will ever use them again.  

Haven't decided yet what I will put in the picnic basket...but I thought it was a nice addition to this room :)

And to answer the question in all of your minds....no, the kitchen has not made any progress!  Still living in a mess!

Blessings,

Ronda

Sunday, May 5, 2013

Progress

So, it's been more than 2 weeks since I posted anything.  I must not be cut out for the blogging world, afterall :(

I guess my problem is in always wanting to have pictures to show you.  And I prefer to show a finished project.  I actually had some pics of the craft room a week ago, but never quite got around to putting them on the ol' blog.  

Now I'm actually glad that I didn't as hubby and I spent some time cleaning up the room yesterday and now it looks MUCH better!  :)

So, the walls are all painted, the shelves are back up and I have actually put a few books on the shelves on the right of this pic. (Please ignore the UGLY green couchy-thingy-- it will go bye-bye as soon as I can find something to replace it!)
 This wasn't really the order I wanted these pics, but it is what it is-- I haven't had much luck moving them once I load them.  This next pic shows that we have big stuff in store for this end of the room!  The 2 closet doors used to be the same, but hubby cut out that wall so there will be open shelving there, also.  I had thought we would cut out the entire wall, which is why I didn't paint it, but obviously, it didn't work quite like that.  So, the remainder of that wall will be painted pale yellow, too.  

This will be my sewing corner.  I LOVE THAT! Being able to say I have an actual sewing corner! My sewing machine will sit on the desk (I will make a dust cover for it at some point), all my sewing supplies in baskets and jars on the shelves around me. *sigh of contentment*

The little window seat area will most likely hold a tv so that hubby and I can watch while I craft. The other desk area would be great for all of my scrapbooking stuff, or wrapping paper and ribbon, or a hundred other ideas that I have.  

Sorry this next pic is so bad.  I just wanted you to see that I even made up the bed so that it would not only look better, but it's also ready for company.  These are not the colors that I have chosen, but it works for now! The quilt on the bed I originally made for our guest room.  The embroidered pillowcase is courtesy of my MIL. It actually belongs to my daughter.  The bear I made out of an antique quilt that was full of holes.  


With the lovely warm weather we had earlier in the week, I took the opportunity to paint the window panes that I hadn't done yet.  

Thanks for sticking with me, even when I seem to check out for long periods of time!  I've got a ton of potential projects lined up for summer!

Blessings,

Ronda

Monday, April 15, 2013

Baby Steps


1 coat of Zinsser primer, 2 coats of clean white semi-gloss on doors, trim, baseboards, windows, 3 (!!!) coats of semi gloss on the wall and the cabinets and bookshelves!  Thankfully, the most time consuming part is done.  The walls will be a cinch after all this! 

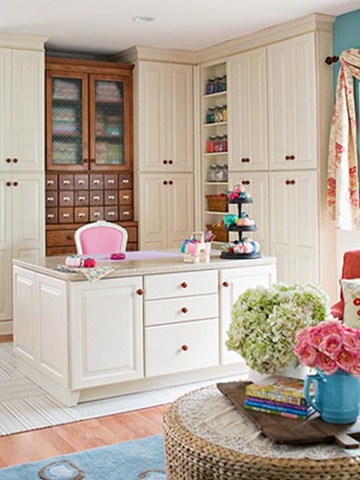
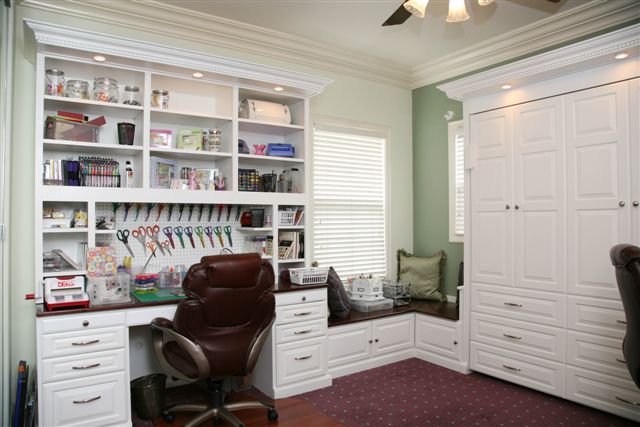
What do you think?  Can I turn this into my own version of this?


Or, even better, THIS?


Step by teeny, tiny step! 

Blessings,

Ronda

Saturday, March 23, 2013

The Craft Room Begins!

To all of my prayer warrior friends out there, please be praying for Cammi and the 7 other youth and 2 adults that are in Show Low, AZ doing some mission work.  They made it safely, but please continue to pray a hedge of protection around them.

So the other day, I was trying to decide on what project I wanted to start.  The transfer project I was all set to begin was a bust because my goofy computer doesn't seem to like my printer so that every time I try to take the print level above draft, it shuts down word.  GRRR!  Since the finished product will already have a slightly faded look to it, I needed the setting to be on best.  

SO...

Other things I wanted to do mostly included cleaning out cabinets as I prepare for the big shift that will happen when we actually get back to the kitchen project.  Well, many of the things that I wanted to clean out included mostly crafty type things.  

I want to move those things to my new craft room!

But why put a bunch of stuff in there only to move it all again when I get ready to paint it.  

SO....

BEFORE shot...the bat cave!  Also known as "the boys' room."

I am already quite pleased with how much just a single coat of primer has lightened up the room!!
Yes, that is my wonderful husband touching some things up so that I could go and start dinner.  
 It did take nearly 7 hours to get everything primed.  Probably won't get back to this room for a while, but I can tell you I will absolutely being finishing it in smaller sections!

Stay safe out there!  Really hoping this is our last snow!

Blessings,

Ronda