Showing posts with label decor. Show all posts

Wednesday, October 30, 2013

Refrigerator Box

You may be wondering, "why on earth have we not heard from Ronda in ages?" Seems to be becoming the norm for me to go a long time between blog posts.

Ah, well, this time I have a really great reason!

VOILA!!
I wouldn't go so far as to say that this is the big kitchen reveal. Quite obviously not done...I won't draw your attention to those things that have yet to be changed.

But do let me draw your attention to the lovely braided rug that my hubby bought me for my birthday!
I spent the last week and a half working on the upper cabinets.

I designed, and my DH built the box above the fridge.  It wasn't there before.
Just a reminder...

Yeah, I know!!!! It's now so light and bright now!!  Love. IT. :)

Trying to decide what I want to put in the open box.  Decor?  ie...
Or some storage options?

These are just baskets I had in other places.  In fact, the burlap lined one has stuff in it, you just can't see it! Bonus! But I'm a big fan of the one on the left.  And I am actually leaning more towards this direction.  Just not sure what I would store up here because I wouldn't want just anything to show up there.

Thoughts?

Blessings, 

Ronda

Friday, October 11, 2013

Console Table

So, my sweet husband is something of a pack rat :)

He comes by it naturally, both his parents are too.  

But, I must confess, there are times when those pack rat tendencies come in quite handy.  

Like when I decided I wanted a console table behind my love seat so that I would have somewhere to set drinks, magazines, glasses, etc.  And since it is technically in my "office" area, I could throw a few office things on there, too!

So, I come up with a picture in my head of what I want, explain it to my hubby, via pics on the web, and voila! I have my console table! 

The wood we used had a couple of different looks to it, so we took advantage of that.  The wood on the top and on the shelf came from an old bunk bed that we took apart.  It had a dark finish already.  The rest of it was pine from inside the wall we removed.  

I wanted to try the recipe that I have seen with steel wool and vinegar to age the wood.  Didn't work quite like I had envisioned, or I did something wrong.  Because it turned the wood quite orangey. And there was a dusty orange film on it.  

So I rubbed it all down and started over.  This time I used a water down version of black milk  paint to just give it a wash of color.  Liking this much better!  I only painted the pine boards, not the ones that were already dark.  Then I gave it a coat of antiquing wax and it was done!


Well, maybe not quite that simple since I ran out of the wax I was using and was too impatient to wait until I could get some more, so created my own using clear wax and a bit of dark stain.  

I like the way it turned out!

Blessings, 

Ronda

Linking to:
Furniture Feature Fridays

Saturday, August 24, 2013

The Red Door

Happy Saturday to you all!

This was a rather unusual Saturday for me.  

I usually spend at least part of my day cleaning the house.  But today, I had projects that were calling to me...

Every time I walked by the front door...
Going THIS way...
...and THAT way...
I thought, "how terribly brown this area is!" 
(Please ignore the mess in the above pic.  That is, of course, my second project of the day.)

Anyone that had been to my house in the last few days had seen my little paint chips taped to the front door as I tried to decide on the perfect color.  This area was just BEGGING for a POP of RED!

Decision-making in general is not one of my strong suites, but when it comes to choosing the perfect shade of red...that was AGONIZING!!
Time will tell.  It changes throughout the day.  If I don't like it, it will only take another coat or 2 of paint.  
It's growing on me :)

The front entryway still needs something...
Definitely need to rid the area of the last vestiges of the orangey pine trim seen in the pic.  

Next up...
A Day of Rest :)

Have a blessed Sabbath!

Blessings, 

Ronda

Wednesday, August 14, 2013

Back Hallway and Hoosier Cabinet

I really thought that I might wow you all and put up two posts in as many days, but it just wasn't meant to be!

I did have a very enjoyable evening out last night with a bunch of other homeschool moms. Yes, we are still technically homeschoolers, even though Cammi is taking 2 classes at the high school this year.  

So one of the things that I have done along with the overall painting downstairs was paint a chalk board strip on my back hallway. 
This is what greets most people when they enter the house, since most use the back door. You can see, it is also where all of our "stuff" gets dropped when we come home.  I actually cleaned it up some for this shot! 

I knew that we had to have places to hang coats and such here, so when I started talking about what to use, DH remembered the coatracks that were in the old church.  So we contacted the new owners and sure enough there was still one there.  There were originally at least 4, but no idea what happened to the rest of them.  

I'm not great at fancy handwriting, but it's fun coming up with things to write on the chalkboard.
Part of the reason that we wanted to make the kitchen larger was to be able to move my Hoosier cabinet in there.  This originally belonged to my great-grandma.  
Since this is meant to be a kitchen piece, I thought that I would fill it with kitchen items.
The red recipe box was my grandma's and has her recipes still in it. 
Yes, the chocolate chips are a temptation. ;)
Love cookbooks!!

Blessings,

Ronda

Linking to:


TDC Before and After


Wednesday, July 31, 2013

A Good Way To Spend A Rainy Day...

Wondering what I have been up to lately?

Maybe a more appropriate question would be "what haven't I been up to?"

Things have really been hopping since the first of the month.  In fact, I can hardly believe this is the last day of July!  AAAAHHHH! Can summer almost be over?  I had so many projects lined up in my head that I KNEW that I would accomplish over the summer!

I know...unrealistic.  When will I ever learn?

But the good news is that the BIG ONE is nearing completion. 

This was my kitchen at the end of last week when my husband rigged up plastic booths to sand. He is so thoughtful!  This way I didn't have nearly the dusty mess!

Ah, this last pic tells me it was Saturday.  Note the bowl of pizza dough sitting on the stove!  Yes, I cooked through the mess! 

And my before pics of right before we started painting to show all the lovely red paint.  I liked it, but am SO over it!
 You can also see the blue that was in the original dining room.  


And of course my not-so-lovely blue countertops which I am over, but am helpless to do anything about right now since they are not at the top of the priority list. 

My beautiful daughter helped me with the painting to work off her trip to Holiday World.  Actually she says she was going to help anyway.  Either way, I was very grateful for her help as it was a very large job.  1 coat of primer and 2 of topcoat, all those cabinets, and lots of wall space!

So, that's what I have been up to!

I will get some more pics up once we have the base boards back down and stuff pushed back to the walls.  

Also, after 7+ months DH is about ready to put down the final boards on the floor!  YIPPEEEEE!!!


Blessings,

Ronda
Sunday, July 14, 2013

Help With a Decision!

I realized today that I had yet to show off the cabinets that I painted in my tiny downstairs bathroom! 

I won't give you the complete reveal because the floor is not done and the trim is still off the doorway. 
But I want opinions, so please read to the end of the post!!


For a while now I had been contemplating painting some of my cabinets.  Every cabinet in the house originally looked like this--


So the logical place to try was this tiny downstairs bathroom where there was only one small upper cabinet and a vanity.  And I knew that white and distressed was the way to go for this primitive loving girl.  


I love them!  Just hoping they hold up for several years, even though it really wasn't too difficult.  

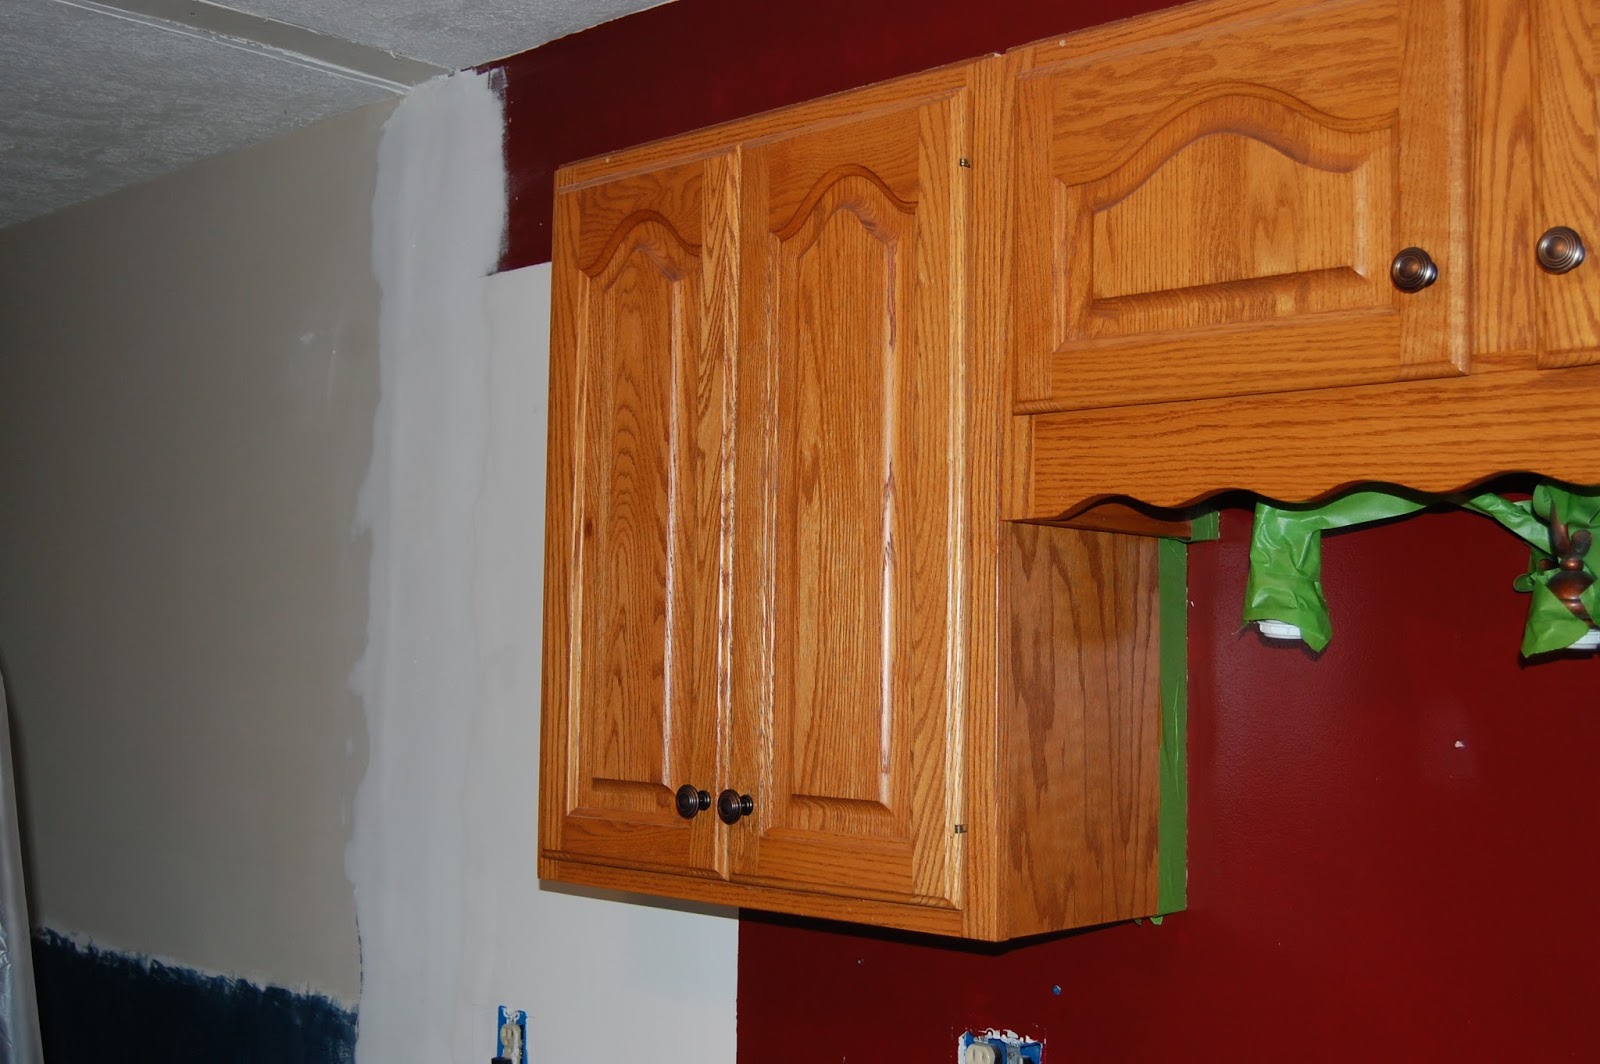
Now for the big question!!  As hubby works diligently to finish laying the wood floor in the kitchen, I can see that I REALLY don't like the floor against the cabinets.  This should have come as no surprise to me since that is why I am painting all my woodwork! 

Something must change!  

The cabinets are custom-built, solid oak cabinets.  I don't know that I can bring myself to paint them.  So I have though about a darker stain over the existing, but that would also darken the kitchen.  So the other option is white paint like I did in the bathroom.  Just maybe not quite as distressed.  

PLEASE, PLEASE, PLEASE GIVE ME OPINIONS!!  

I'm not in a hurry to do it, but when I have a decision like this, it typically consumes my thoughts until I decide! Help put me out of my misery!

Blessings, 

Furniture Feature Fridays

Thursday, June 13, 2013

Chair Make-Over

 This chair has been sitting in my garage for a while now.  When we bought it at a yard sale, there was caning in the seat.  Since it was broken in places, we actually looked into how to re-cane it.  Jeff got so far as to take out most of the caning...and then there it sat.  No reflection on him-- I have given him too many projects!

I had determined that the chair was going to go in the trash, until a pic I saw on a blog one day inspired me.  I had nothing to lose, so I gave it a shot. 


It is far from perfect and I learned a few things along the way.  Don't know if I will ever have the opportunity to another chair like this, but if I do, I might do it a bit differently. 


And now we have 8 chairs to go around our farmhouse table! Two of them still need to be painted, but that's ok, they are fine as is.  Besides, Jeff still has table leaves to make before we actually need 8 chairs!

Blessings, 

Ronda
Furniture Feature Fridays

Thursday, June 6, 2013

Craft Room Update Again...


I realized I haven't given you an update since hubby finished the closet reno. The closets in this room have never been terribly convenient.  They are shorter than normal and all the shelving in them was next to impossible to get to.  So I had him cut out the wall and put shelves all the way across so that I would have a place to store all of my paint supplies.  Since taking out the wall left an ugly spot on the floor, he decided to rip out the carpeting in the closet and put in flooring left over from my daughter's bedroom.  This is a temp fix until we save up the money to replace the carpeting in the entire room.  I'm kind of liking the way this flooring looks, though :)

I would like to figure out a way to hide the mess, but the shape of the closet kind of prohibits that.  I would welcome ideas...

Hadn't shown you any pics since I got all of my craft "stuff" put in this room, either.  My daughter thinks it may be tough to get to the thread that I want! Ah, well...it's cute, right?

Some things I found in my grandma's sewing box...

Which is actually the box down there on the bottom shelf.  I still have a small collection of paper patterns that I can't bring myself to get rid of, even though I doubt I will ever use them again.  

Haven't decided yet what I will put in the picnic basket...but I thought it was a nice addition to this room :)

And to answer the question in all of your minds....no, the kitchen has not made any progress!  Still living in a mess!

Blessings,

Ronda

Sunday, May 5, 2013

Progress

So, it's been more than 2 weeks since I posted anything.  I must not be cut out for the blogging world, afterall :(

I guess my problem is in always wanting to have pictures to show you.  And I prefer to show a finished project.  I actually had some pics of the craft room a week ago, but never quite got around to putting them on the ol' blog.  

Now I'm actually glad that I didn't as hubby and I spent some time cleaning up the room yesterday and now it looks MUCH better!  :)

So, the walls are all painted, the shelves are back up and I have actually put a few books on the shelves on the right of this pic. (Please ignore the UGLY green couchy-thingy-- it will go bye-bye as soon as I can find something to replace it!)
 This wasn't really the order I wanted these pics, but it is what it is-- I haven't had much luck moving them once I load them.  This next pic shows that we have big stuff in store for this end of the room!  The 2 closet doors used to be the same, but hubby cut out that wall so there will be open shelving there, also.  I had thought we would cut out the entire wall, which is why I didn't paint it, but obviously, it didn't work quite like that.  So, the remainder of that wall will be painted pale yellow, too.  

This will be my sewing corner.  I LOVE THAT! Being able to say I have an actual sewing corner! My sewing machine will sit on the desk (I will make a dust cover for it at some point), all my sewing supplies in baskets and jars on the shelves around me. *sigh of contentment*

The little window seat area will most likely hold a tv so that hubby and I can watch while I craft. The other desk area would be great for all of my scrapbooking stuff, or wrapping paper and ribbon, or a hundred other ideas that I have.  

Sorry this next pic is so bad.  I just wanted you to see that I even made up the bed so that it would not only look better, but it's also ready for company.  These are not the colors that I have chosen, but it works for now! The quilt on the bed I originally made for our guest room.  The embroidered pillowcase is courtesy of my MIL. It actually belongs to my daughter.  The bear I made out of an antique quilt that was full of holes.  


With the lovely warm weather we had earlier in the week, I took the opportunity to paint the window panes that I hadn't done yet.  

Thanks for sticking with me, even when I seem to check out for long periods of time!  I've got a ton of potential projects lined up for summer!

Blessings,

Ronda